Custom ROM for Sup Game Box 400-in-1
Dumping the ROM - an attempt
Notice: Any requests on getting the ROM images from me will not be entertained!
Disclaimer: Do this at your own risk! Data loss, corruption or serious damage to the unit may occur! Proceed with caution!
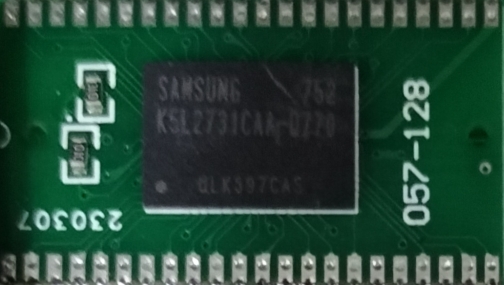
Most of the Sup Game Box 400-in-1 contains a BGA breakout board with a BGA flash sitting on top of it. They are soldered right onto the unit’s PCB and it presents many challenges to desolder and extract the ROM.
(If I’m not mistaken - some of these handhelds have a TSOP-56 flash instead of the breakout board. They are much easier to extract with conventional soldering tools)
For proper removal of the breakout board “ChipQuik” removal alloy is used. Suggestions are welcome on other ways to extract the board without using the expensive ChipQuik!
If you are not interested in the earlier attempts, you can go to “How to Dump the ROM” link instead. 
First attempt (October-November 2020):
For the first try in 2020, I managed to use a hot-air station. Bad news - the flash chip falls out and the breakout board did NOT get desoldered. Unfortunately, I broke the whole thing and it is beyond repair. I had salvaged the other parts such as the TFT, the rubber button pads, the miserable plastic casing and the broken board for other uses.
However, using the expensive “ChipQuik” removal alloy I had safely extracted the breakout board without overheating the BGA chip, or ripping out the traces on the handheld’s PCB.
Next - we want the stuff inside. This is another hurdle which I tried doing it on-and-off for a few years. Initially, there was a schematic of the breakout board floating around in the EEVBlog forums thread:
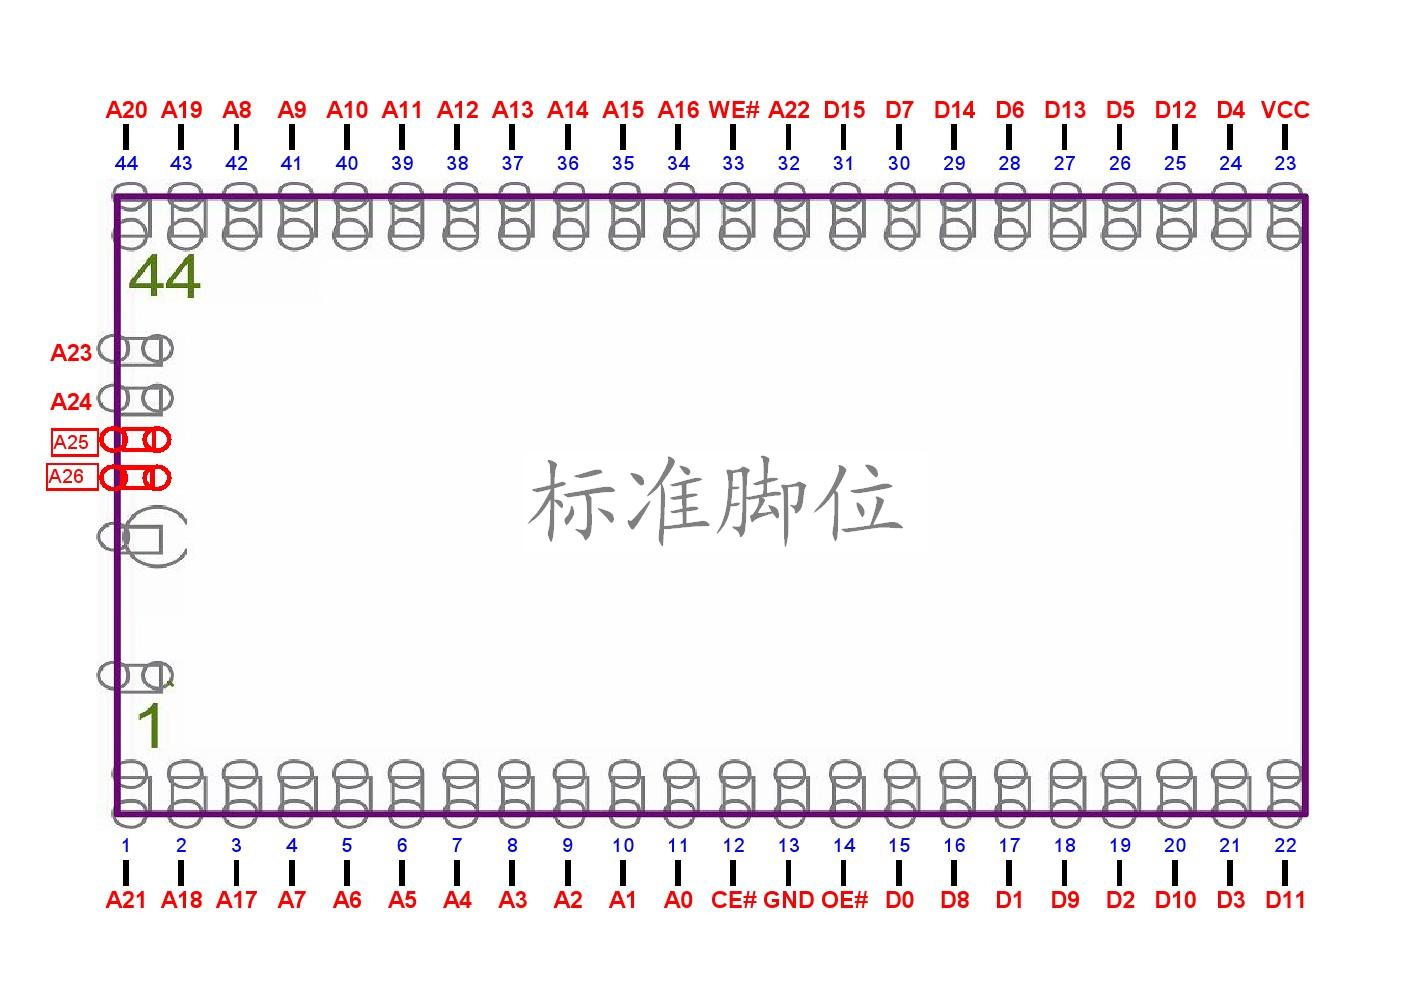
The shape of this board resembled SOP-44 too - and there are many of these SOP-44 to DIP adapters around in the online stores. So I got one there and tried fitting the breakout board in…
… it just won’t fit well. I had to file the corners off like this:
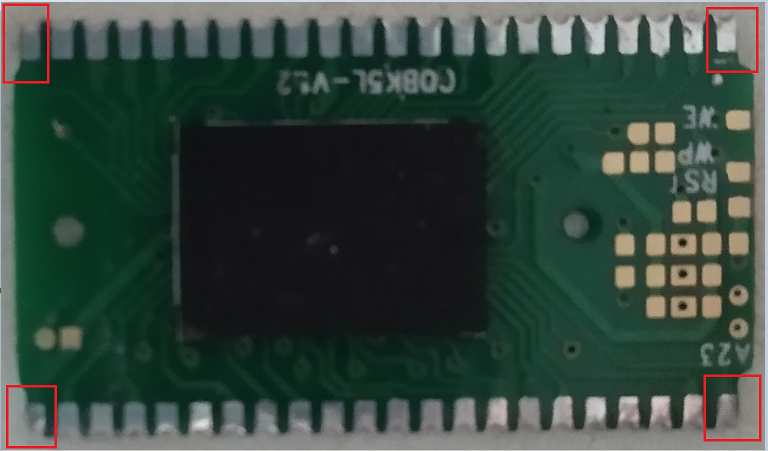
Finally it fits well:
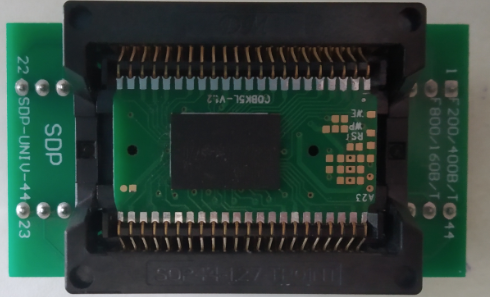
From the provided pinout, I then connect the converter to the MCP23017 I/O expanders, Raspberry Pi, and wrote a Python script. This can be found in my repository.
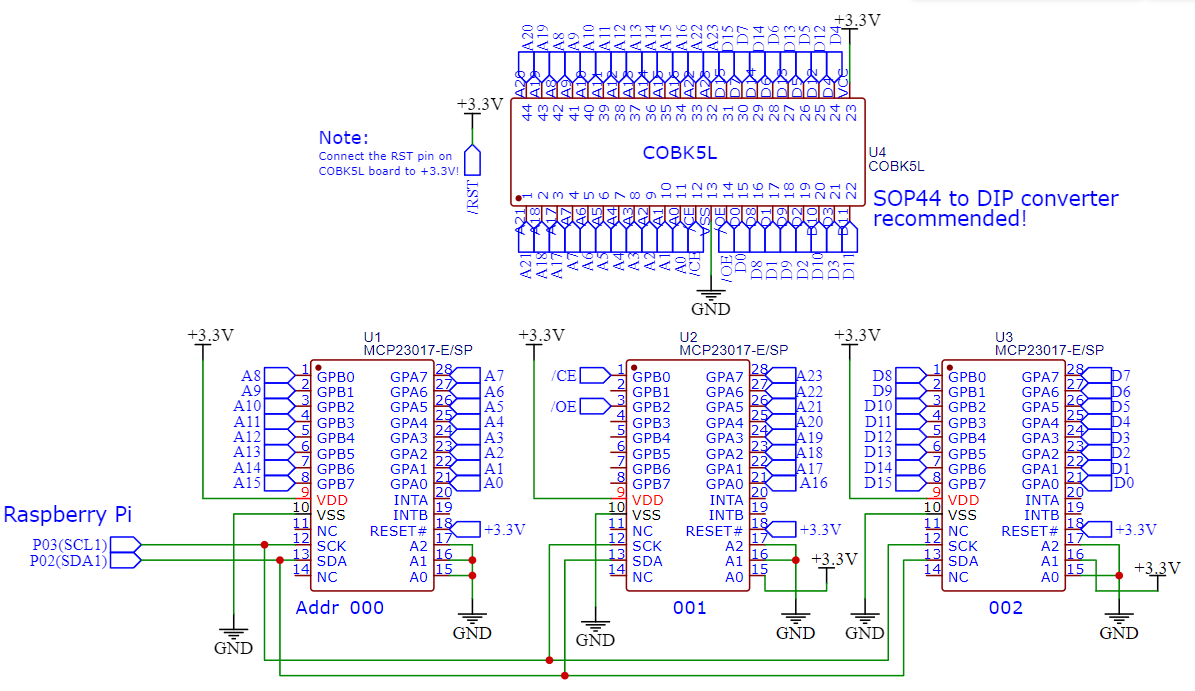
Since it runs on an I/O expander and the Raspberry Pi, dumping 16 megabytes would take almost a whole day! Unfortunately (which is already expected), trying to run this ROM into the EmuVT emulator just giving me a black screen.
Second attempt (January 2023):
I didn’t work on this for more than a year after that attempt. One fine day I found another schematic for the breakout - this time it is slightly different:
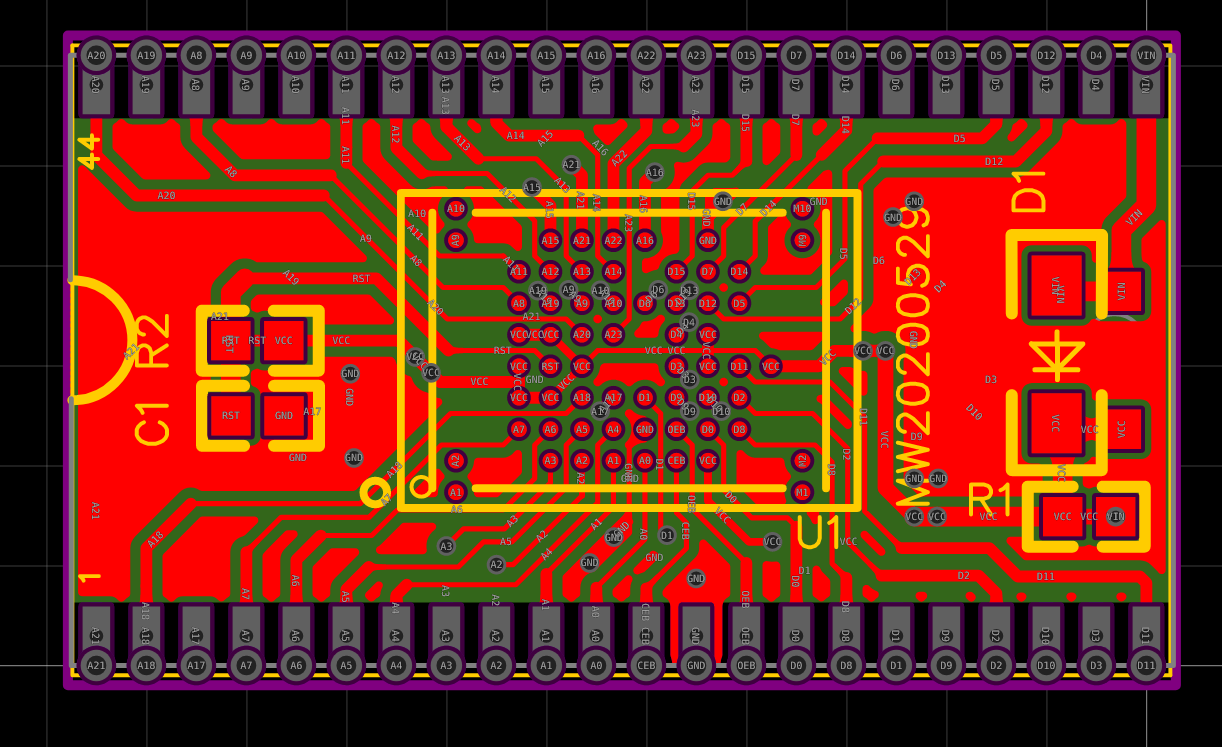
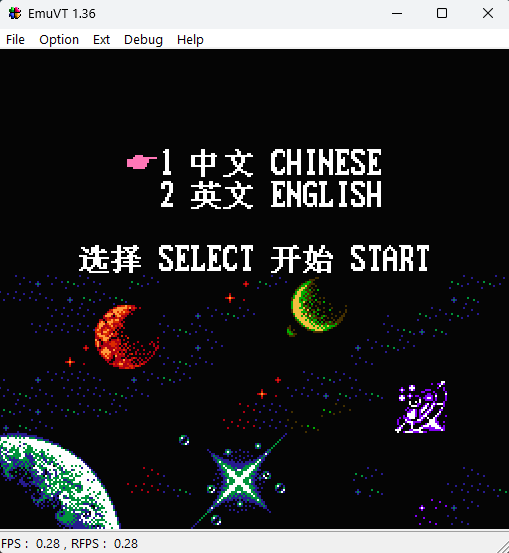
I took out that ROM dumper again, dusted it off, reworked some of the wirings and then dump again. This time, I got the full ROM and it works with the EmuVT:
In between, I was also experimenting on an idea to create a ROM emulator using the Raspberry Pico and the Teensy 4.1. You can refer to the page for more information.
Third attempt (April 2024):
To improve the dumping speed, I had reworked this dumper using Raspberry Pico with Arduino instead. It now takes 35 minutes instead of many hours to dump:
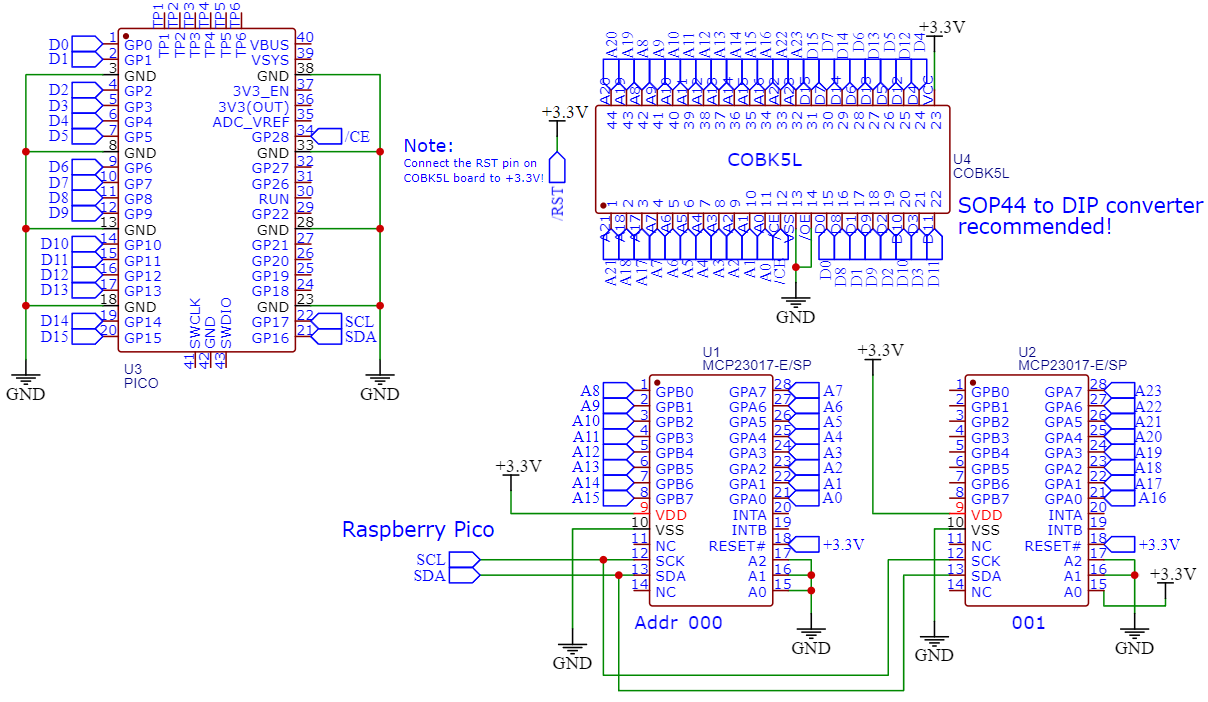
For analysis, please read the ROM dump analysis page.
Extra Notes:
Aleksandr Serdyukov dumped its ROM using an Arduino Mega and documented his process in his Habr page (articles written in Russian, use Google Translate!).
Other attempts of dumping its ROM was also mentioned in the 4PDA forums.
The attempts were also journalled in my Hackaday.io place.